AWS DMS (Data Migration Service) – Configure Replication Instance, Endpoints and Migration Task
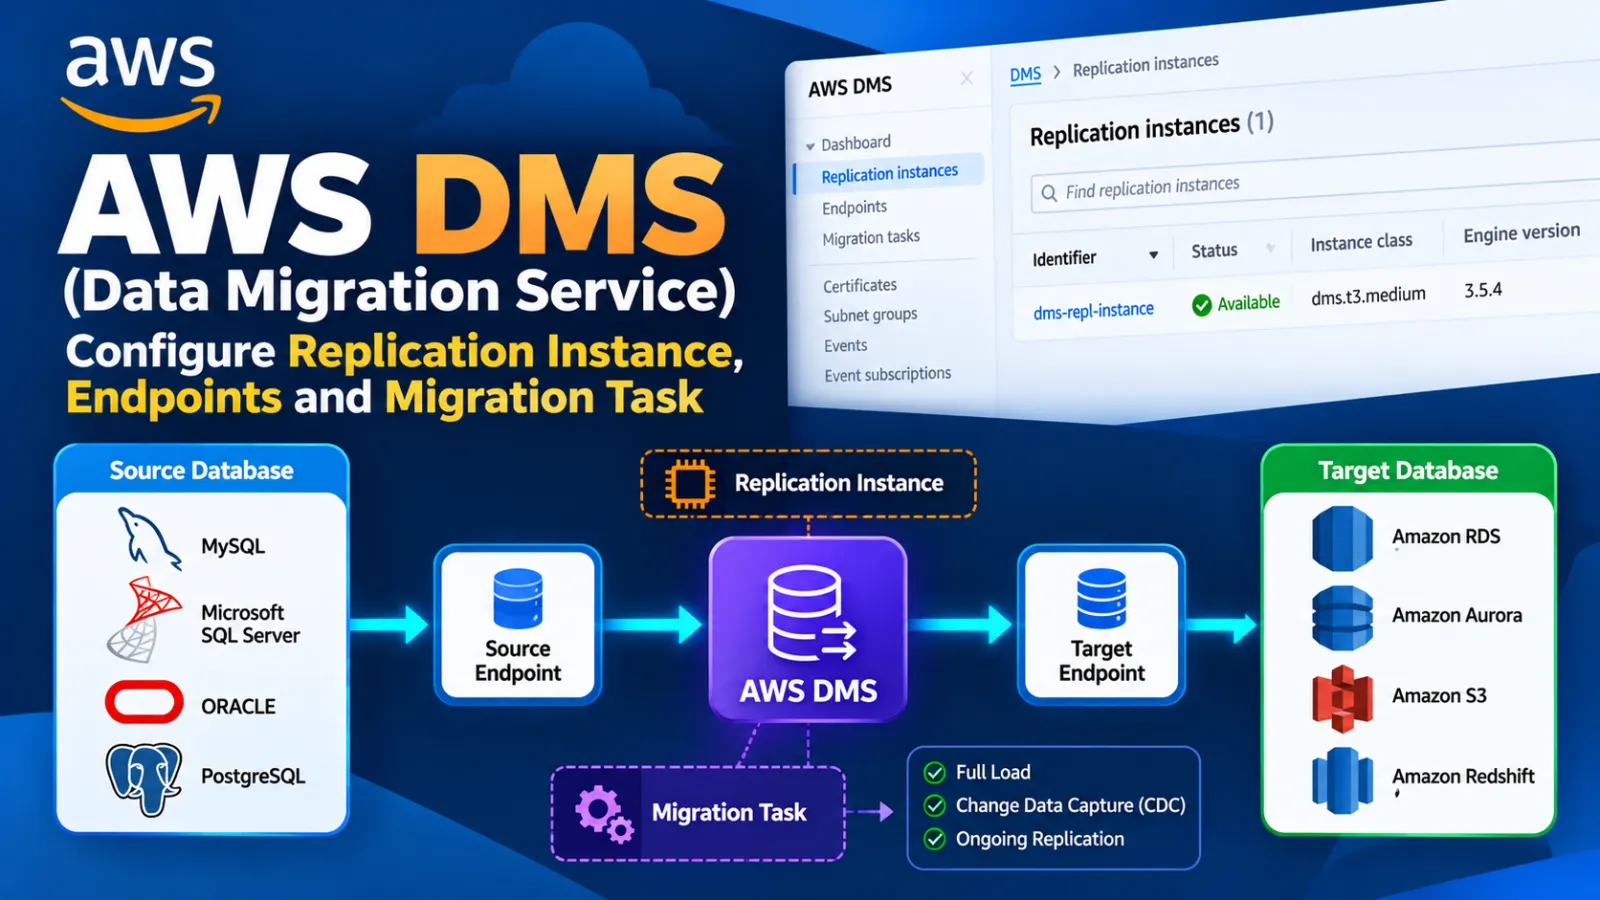
AWS DMS (Data Migration Service) - Replication Instance, Endpoints and Migration Task
Suggested categories: AWS, Cloud, Database, SQL Server
Purpose: This tutorial documents the supplied AWS DMS configuration flow for creating a replication instance, configuring source and target endpoints, creating a migration task, defining table mappings, and adding transformation rules.
Note: The screenshots in this Word document are taken from the AWS DMS configuration document you supplied. AWS console wording and layout may differ from the source document when you perform the steps yourself.
1. Create a DMS Replication Instance
The replication instance is the compute resource used by AWS DMS to run the migration task.
In the AWS Console, open the DMS replication instances section and create a new replication instance.
Name: Enter your desired replication instance name.
Instance class: Select the type of instance required.
Engine version: Use the required/default DMS engine version.
High Availability: Select Multi-AZ or Single-AZ.
Allocated storage: Set storage according to the requirement.
VPC: Select the VPC where the replication instance will run.
Replication subnet group: Select the required subnet group.
Network/security: Make sure the replication instance can reach both source and target databases.

Figure 1 - DMS replication instance settings (source document page 1).

Figure 2 - Storage and VPC/connectivity settings (source document page 2).

Figure 3 - Replication instance list after creation (source document page 2).
2. Network and Security Group Connectivity
Before creating the endpoints, verify that the DMS replication instance can reach the source and target databases through the selected VPC, subnets and security groups.
The supplied configuration notes that public access or security-group changes may be required for connectivity. Configure access according to your environment.
Note: The supplied document uses port 3306 as an example. Use the actual TCP port required by your database engine.
3. Create the Source Endpoint
The source endpoint tells AWS DMS where to read the source data.
1. Select Create endpoint.
2. Choose Source endpoint.
3. Enter the endpoint identifier/name.
4. Select the source database engine.
5. If the source is an AWS RDS instance, select Select RDS DB instance and choose the required RDS instance.

Figure 4 - Create endpoint and source endpoint configuration (source document page 3).

Figure 5 - Database engine selection (source document page 3).

Figure 6 - Selecting an RDS DB instance for the source endpoint (source document page 4).
4. Configure Source Endpoint Access and Test the Connection
For manual database access, the supplied document specifies the following fields:
Access to endpoint database: Choose Provide access information manually.
Server name: Enter your database server endpoint/hostname.
Port: Enter the database TCP port.
User name: Enter the database user name.
Password: Enter the database password.
Select the required VPC and replication instance, then run Test connection. The supplied document states that the endpoint can be created after a successful connection test.

Figure 7 - Manual source endpoint access settings (source document page 4).

Figure 8 - Test endpoint connection (source document page 5).
5. Create and Test the Target Endpoint
Repeat the endpoint process for the target database, selecting Target endpoint instead of Source endpoint.
1. Select Create endpoint.
2. Choose Target endpoint.
3. Select the destination database engine.
4. Provide the destination server, port, user name and password as required.
5. Select the required VPC and replication instance.
6. Run Test connection and verify the connection status.
6. Create a Database Migration Task
After the source and target endpoints are available, create a task from Database migration tasks.
Task identifier: Enter your task name.
Migration type: Migrate Existing Data.
Target table preparation: Truncate.
LOB column settings: Limited LOB mode.
Maximum LOB size: 6400 KB in the supplied configuration.
Task logs: Turn on CloudWatch Logs if logging is required.
Note: Review the Truncate setting carefully before using the task against a target that contains data, because the supplied configuration is intended to prepare the target tables by truncating them.

Figure 9 - Migration task configuration (source document page 5).

Figure 10 - LOB settings and optional CloudWatch logging (source document page 6).
7. Configure Table Mappings
Table mappings define which schemas and tables will be included in the migration.
Set Editing mode to Wizard.
Open Selection rules and choose Add new selection rule.
Schema: Enter the source schema name.
Source name: Enter the source database name.
Source table name: Use % to include all tables, or enter a specific table name.
Action: Include.
To replicate multiple specific tables, add a separate selection rule for each table.

Figure 11 - Table mapping selection rule configuration (source document page 6).
8. Add Transformation Rules
Transformation rules can rename or otherwise transform selected schema, table or column names during migration.
Open Transformation rules and choose Add transformation rule.
Rule target: schema.
Source name: Enter the source schema name.
Action: rename.
Enter the destination name in the rename field.
The supplied document demonstrates a schema rename from the source name to a destination name.

Figure 12 - Transformation rule example (source document page 7).
9. Save and Start the Migration Task
1. Review source and target endpoints.
2. Review table selection rules.
3. Review transformation rules, if used.
4. Click Save.
5. Select Manually Start when required.
6. Select the migration task and start it.
10. Quick Reference
Source Database
|
v
Source Endpoint
|
v
AWS DMS Replication Instance
|
v
Migration Task
| |
| +--> Table Mapping
|
+--------------> Transformation Rules
|
v
Target Endpoint
|
v
Target Database
11. Final Checklist
Replication instance created.
VPC, subnet group and storage selected.
Source endpoint created and tested.
Target endpoint created and tested.
Migration task created.
Migration type and target-table preparation reviewed.
LOB settings reviewed.
CloudWatch Logs enabled if required.
Selection rules configured.
Transformation rules configured when required.
Task saved and manually started when required.
Discussion (0)